- Published on
A Quick Guide to Deploying a NestJS App to AWS ECS Using Pulumi
- Authors

- Name
- joseph Goksu
- @josephgoksu
Overview
Introduction
One of my favourite tools is Pulumi. It is an excellent solution for developing and deploying apps to cloud platforms like AWS, Azure, and Google Cloud.
I have been using it for a while now, and I am quite pleased with the results. It is extremely simple to use and very powerful.
In this article, I'll show you how to deploy a NestJS app to AWS ECS using Pulumi.
Prerequisites
Step by Step Guide
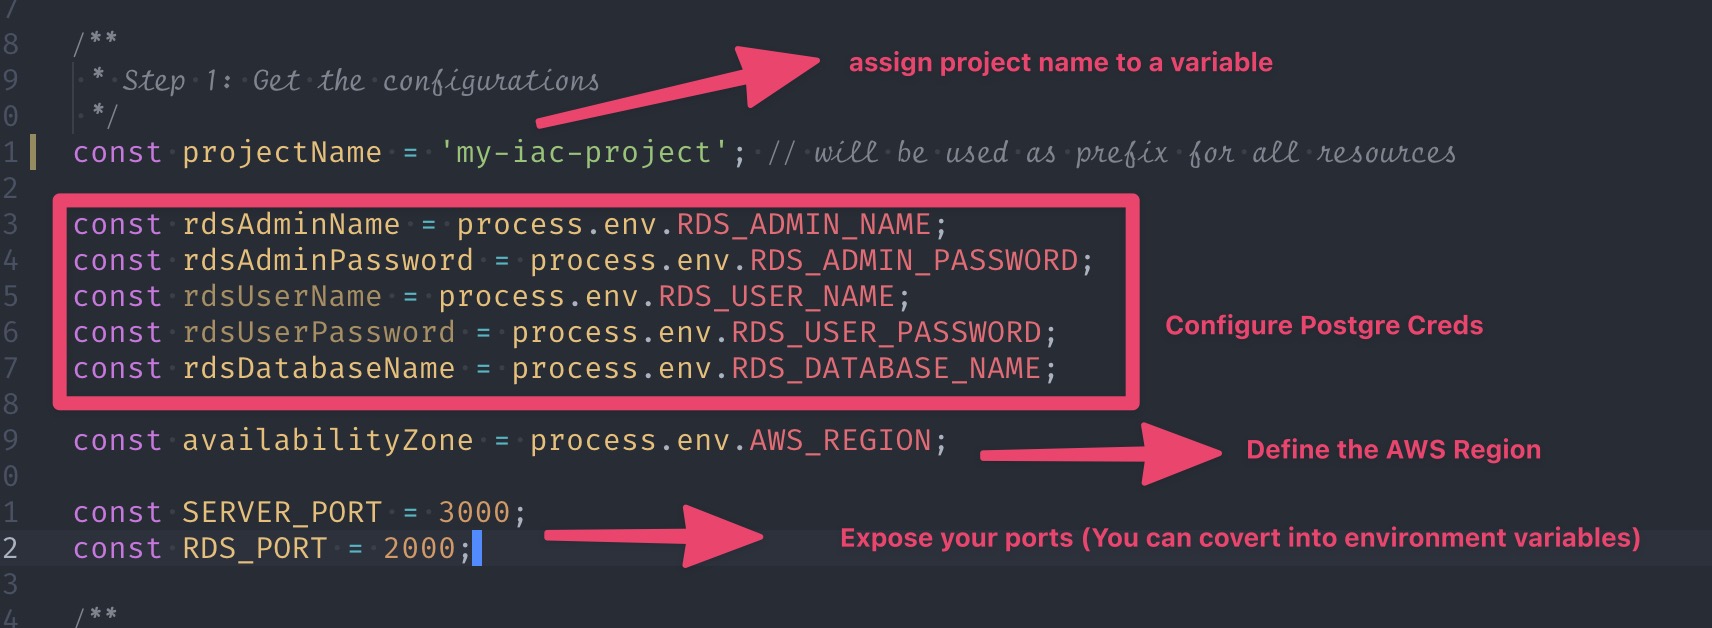
Create a new Pulumi project
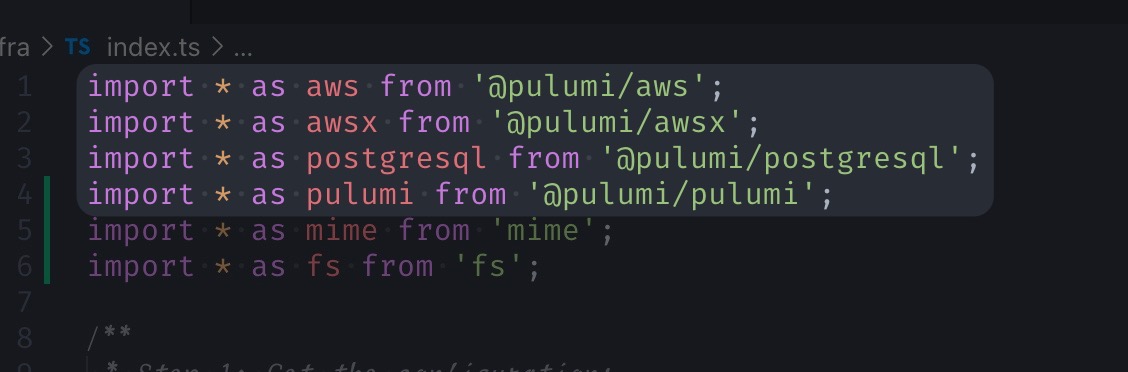
$ pulumi new my-project

$ cd my-project
Install the Pulumi NPM dependencies and import them into the relevant js/ts file.
- Define Container's credentials.
- Create a VPC, Gateway and Route Table
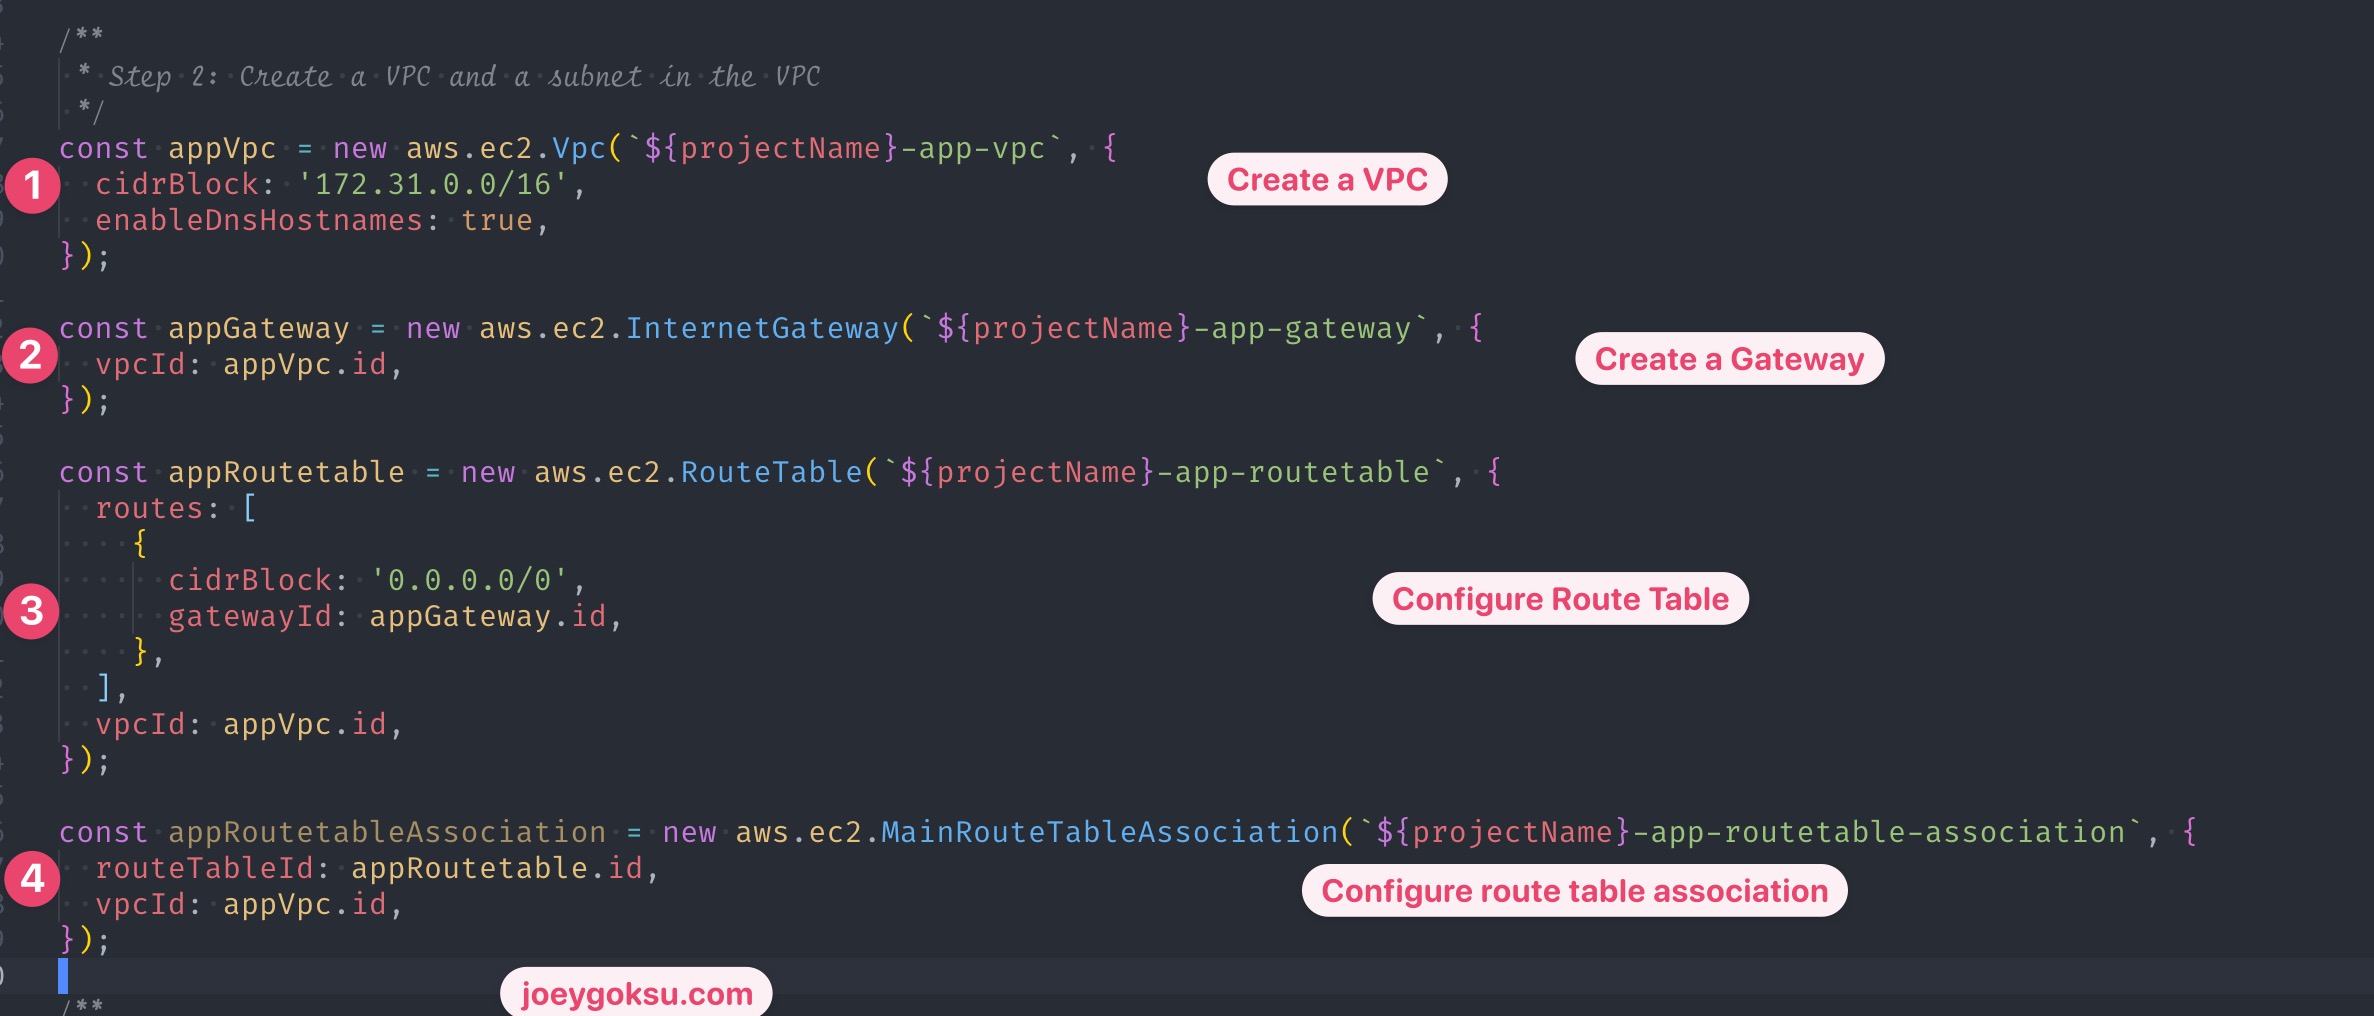
I'd want to show you an AWS Architecture diagram at that point.
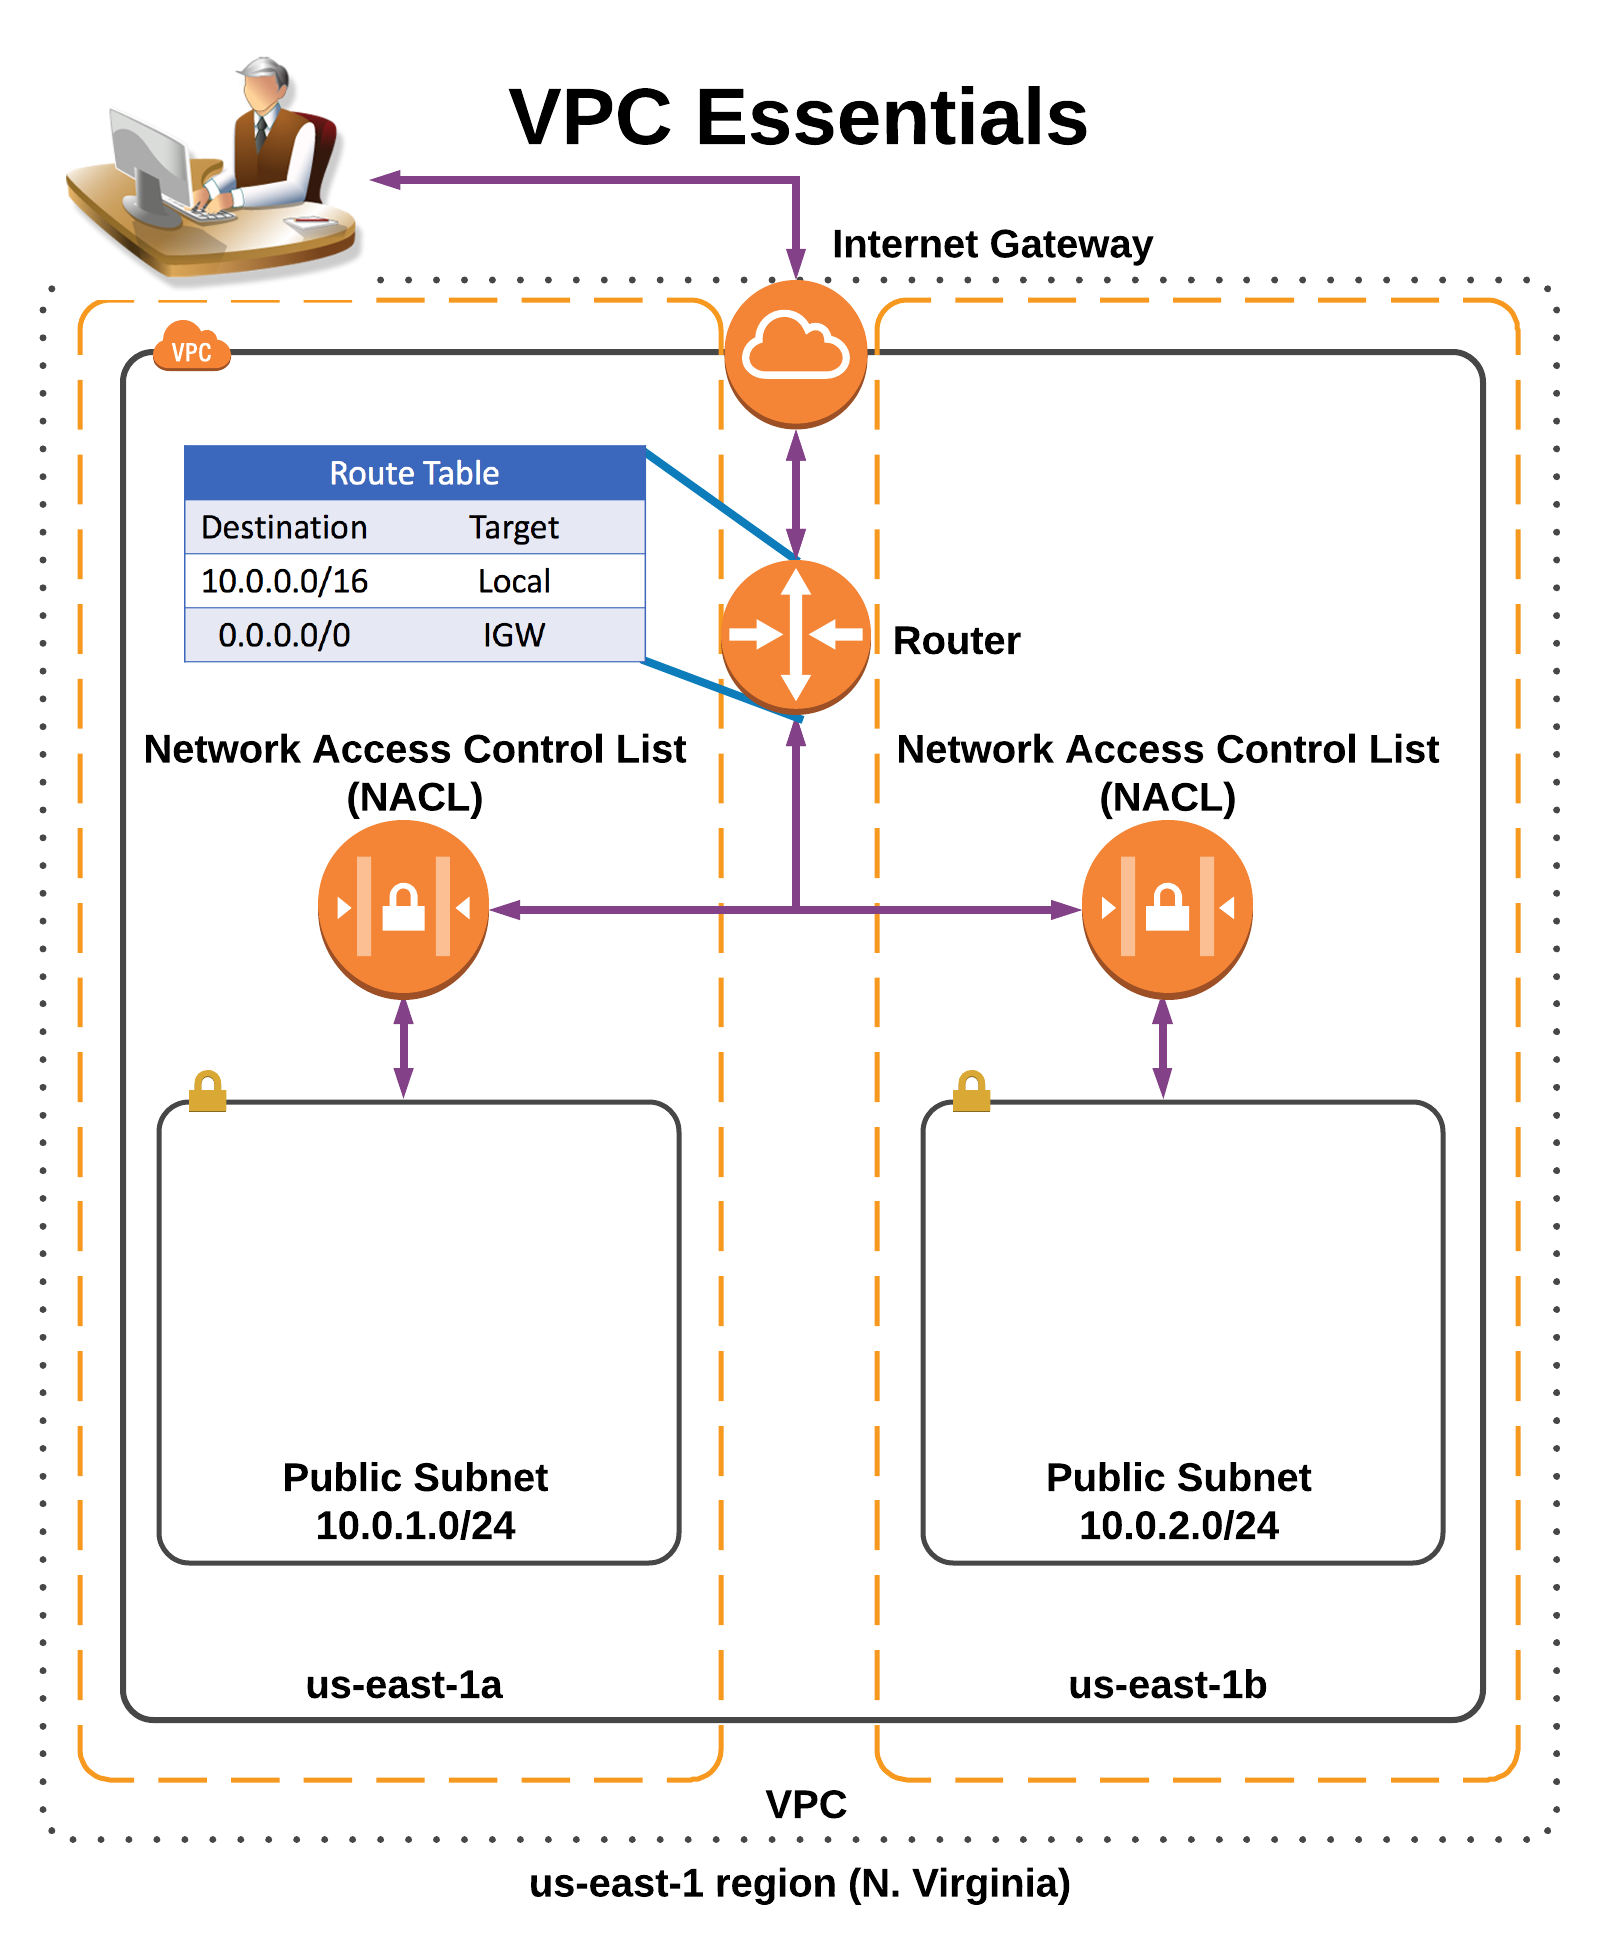
You can find best practises for constructing a VPC, Subnets, and so on, but we don't need to do that for this experiment.
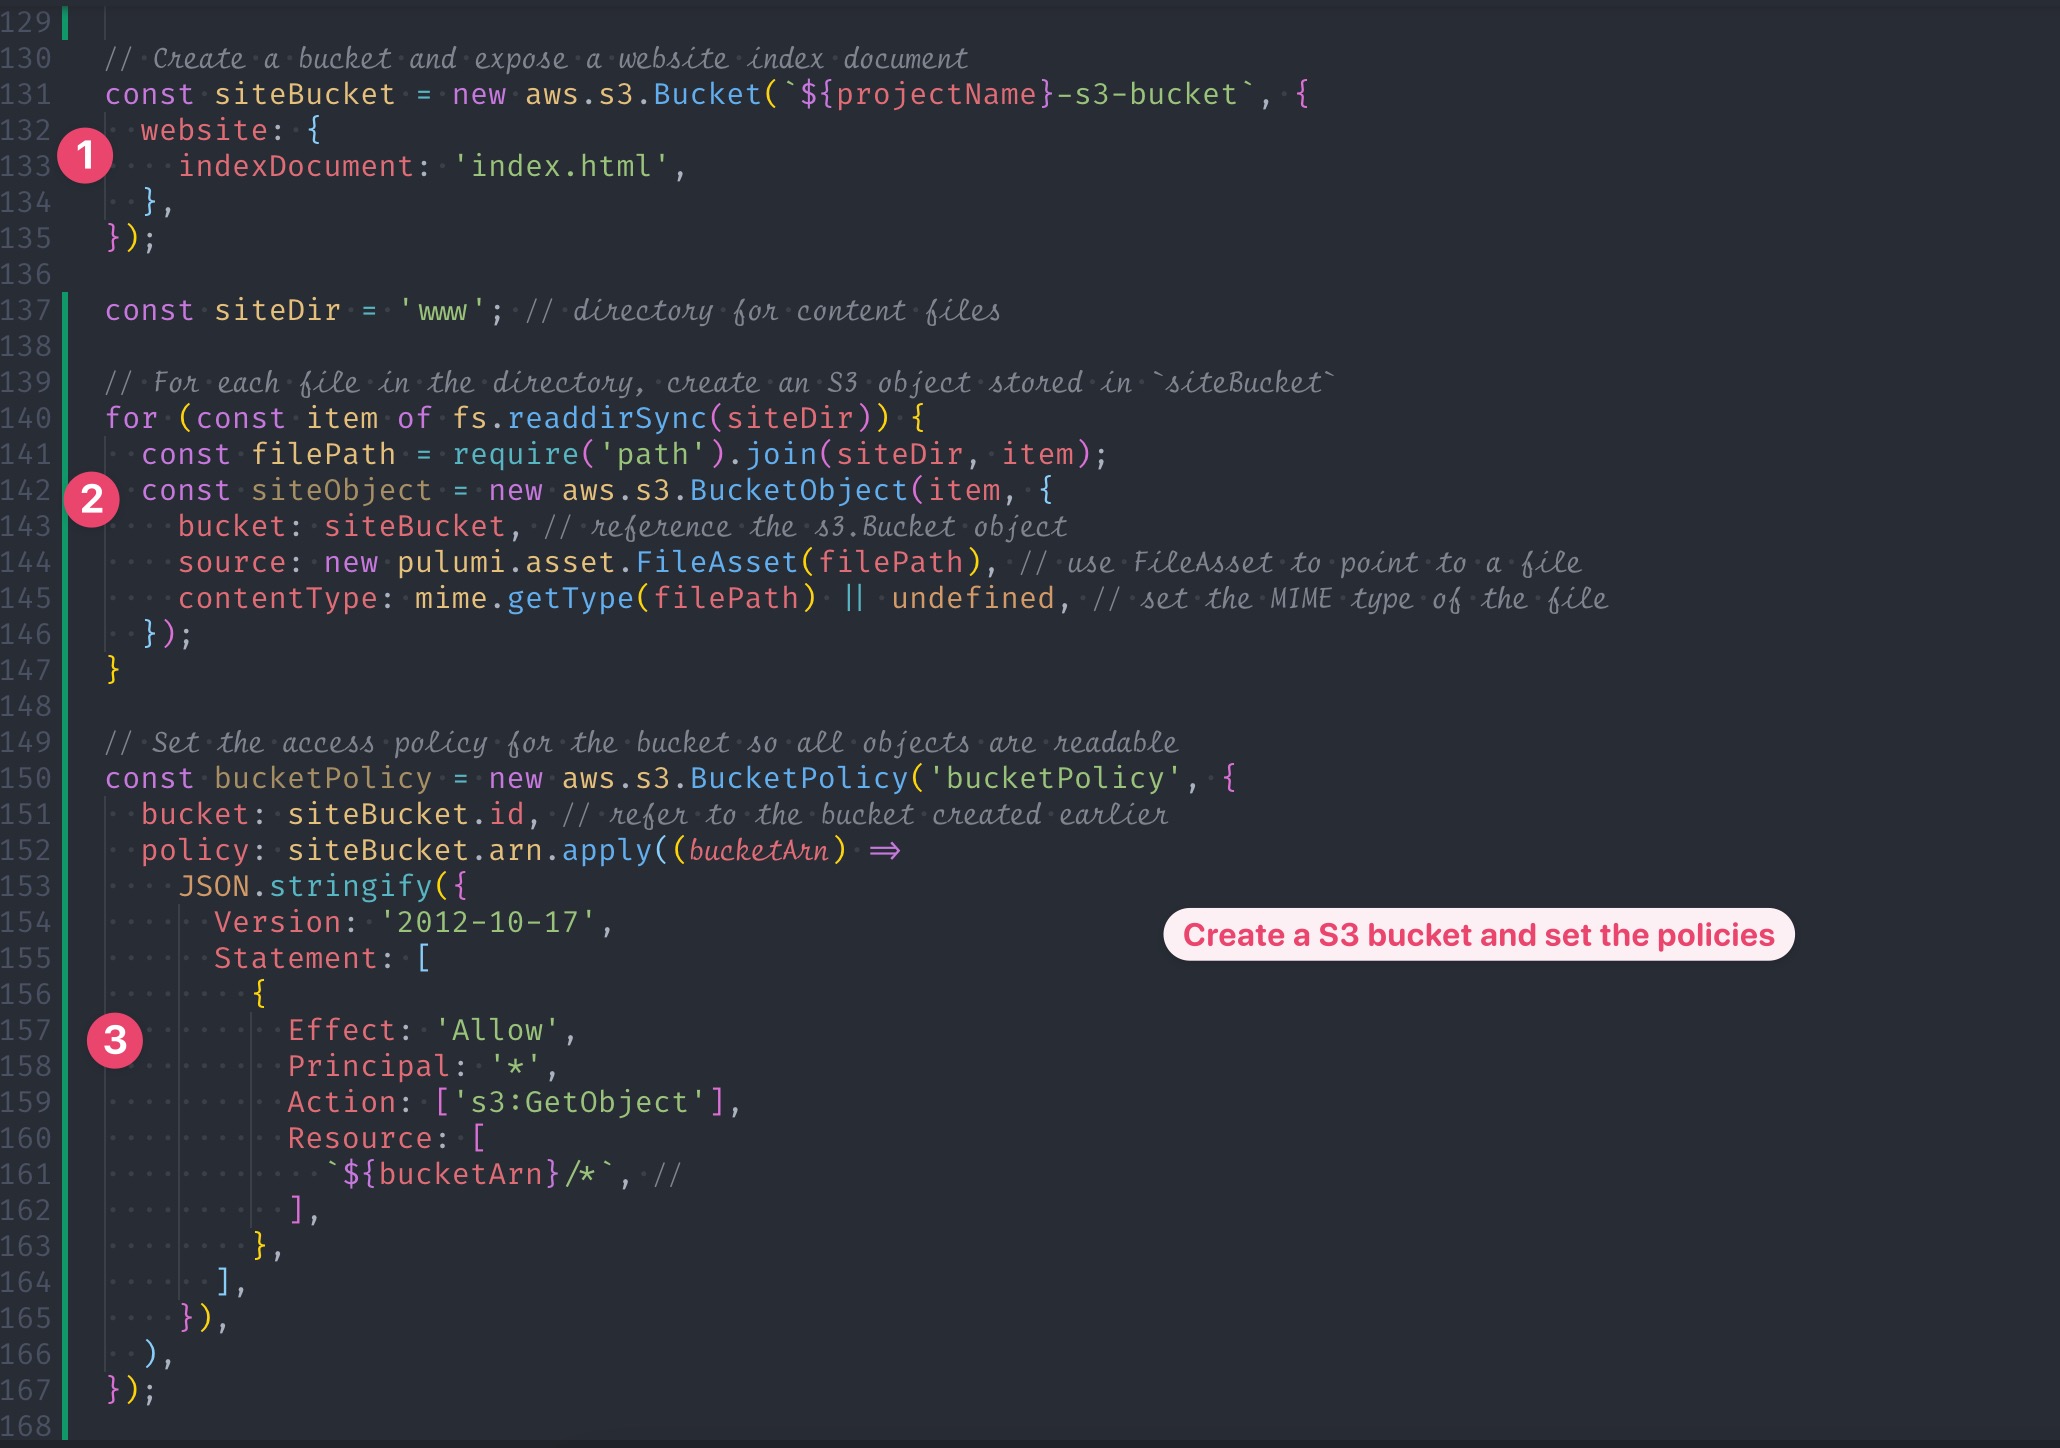
- Create an S3 bucket to hold the static files (I assume we also have frontend app)
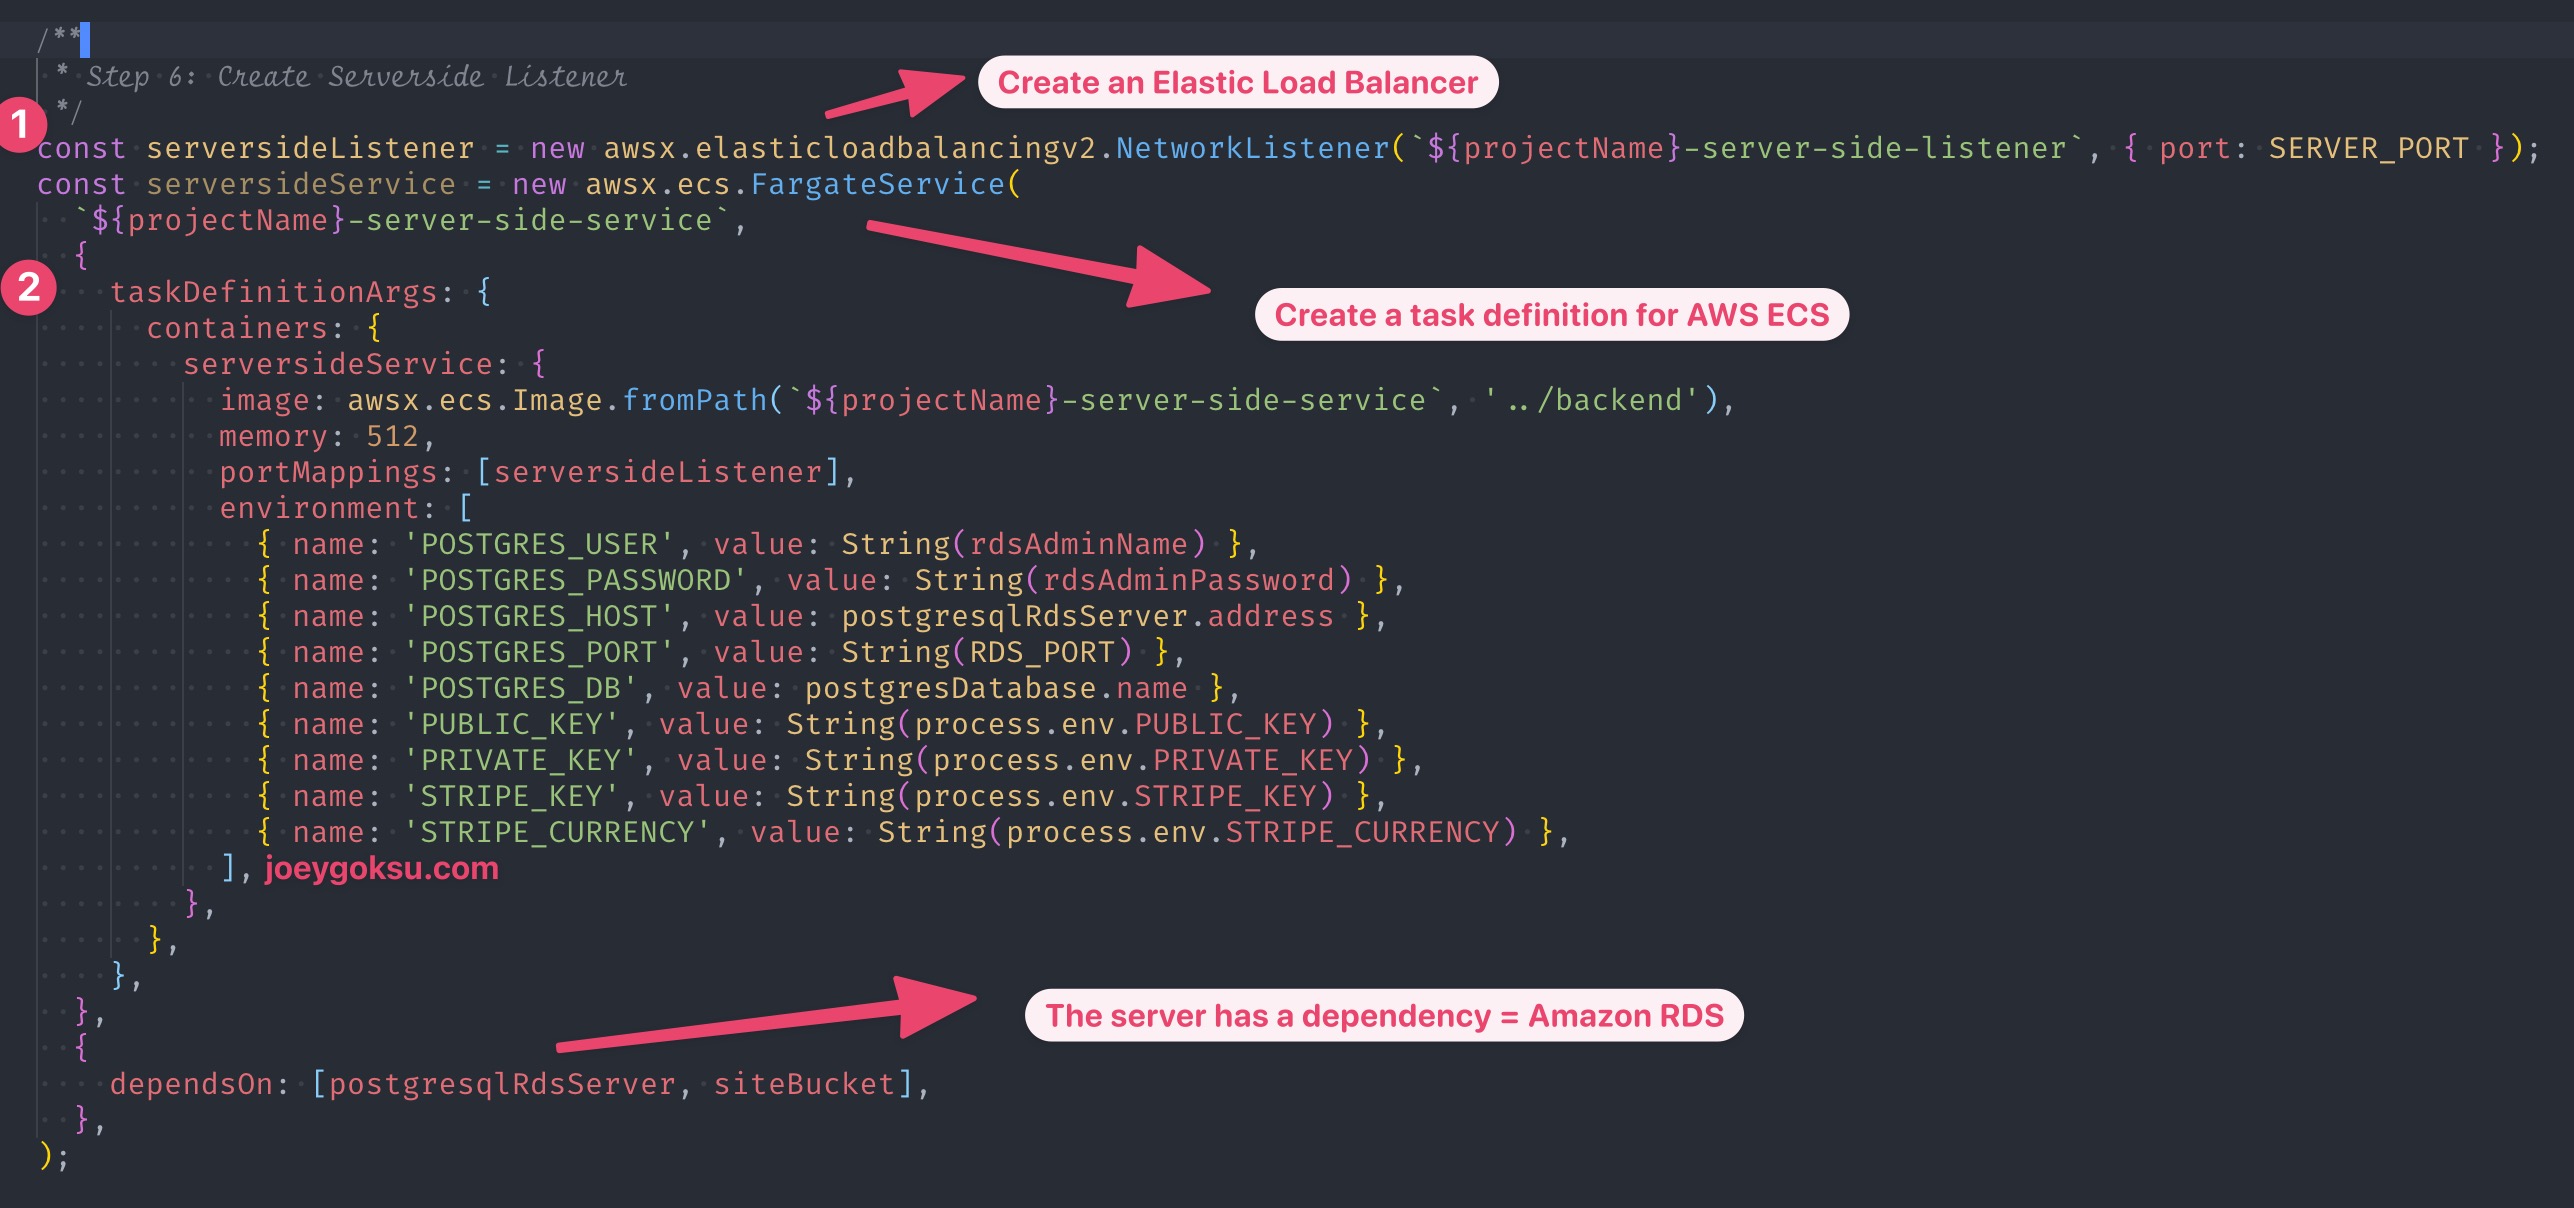
- We're almost finished. To reach the server app, we must first establish an Elastic Load Balancer. Following that, we will define an AWS ECS fargate task.
A ECS cluster will be created using the task definition. It will also generate our Docker image and upload it to the ECR.
- To run the IaC, use the following commands.
$ pulumi up
- Check the output on the pulumi dashboard. That's it. :)
See you in the next hands-on lab. Thanks for reading! Reach out to me on Twitter if you have any questions or comments.